Recently, Smilodo company has already created the right tool for faster and better individuality when creating an online store. Now each of our clients can personalize the appearance of their site, in particular the "header" and "footer": choose the appearance of the entire block or part that is needed or not needed for the set goals.
But as for the content part of the site - we have a constructor in which you can create content of varying complexity.
And this article will talk about the innovations that have been added, as well as tell you how to use it.
Modified and improved:
Using versioning when creating content
Create and use your own item templates
Moving and cloning items
Positioning a floating panel
And now, in more detail with examples
Simplified work with content versioning
We hid all the functionality for working with versioning in floating panels and divided it into stages, as well as added zeroing of all versions to the installed one, which gives more flexibility when editing content.
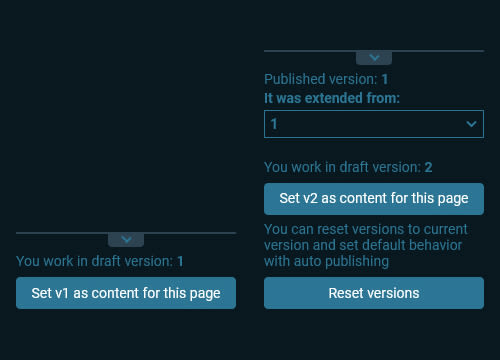
Click on the "Use versions" button in the lower left corner and one of the windows will open (depending on whether some content versions are installed or not).
If a pop-up panel opens (as in the first half of the picture), then you are working without any versions of the page installed (by default, the content version is published and becomes available on the site side - auto save every 3 seconds).
Working with the installed versions, you can still install new versions and switch between them, as well as the ability to "Reset versions" by clicking on the appropriate button. By resetting versions, the content itself will be expanded from the last published version.
You can see how it works in this video: # 1 How the constructor works (3:07) on our Youtube channel.
Creating your own component templates
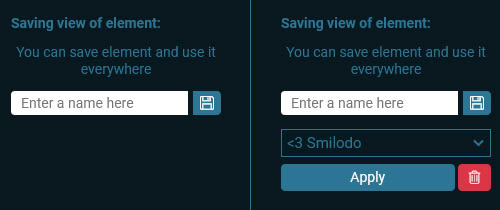
The first part of the picture shows the form for adding your template. First, edit the element and when it's complete, come up with a name and save. After saving the element's appearance, a form for applying this type of component will appear: a list of all your saved templates from the drop-down list, the apply button and the delete button.
Create an unlimited number of your own templates and apply them to all editable pages.
You can see how everything works in this video: # 3 Settings for constructor elements (5:20) on our Youtube channel.
Moving and cloning items
Previously, moving and even planning elements was not possible. We ourselves have come across a situation where it would be easy to move a component or clone the same element further down the content, and now this is possible.
All you need to do is just hover over the desired component and select the one you need in the navigation icons (when you hover over which, a hint appears).
Hold the mouse button over the move icon and you will see a visualization similar to adding components from the "Elements" tab. Further, we simply add the current element to a new location, and if during these actions you also hold down "SHIFT", then you can copy the entire element to a new location on the current page.
You can see how everything works in this video: #2 Basic constructor functions (5:48) on our Youtube channel.
Positioning a floating panel
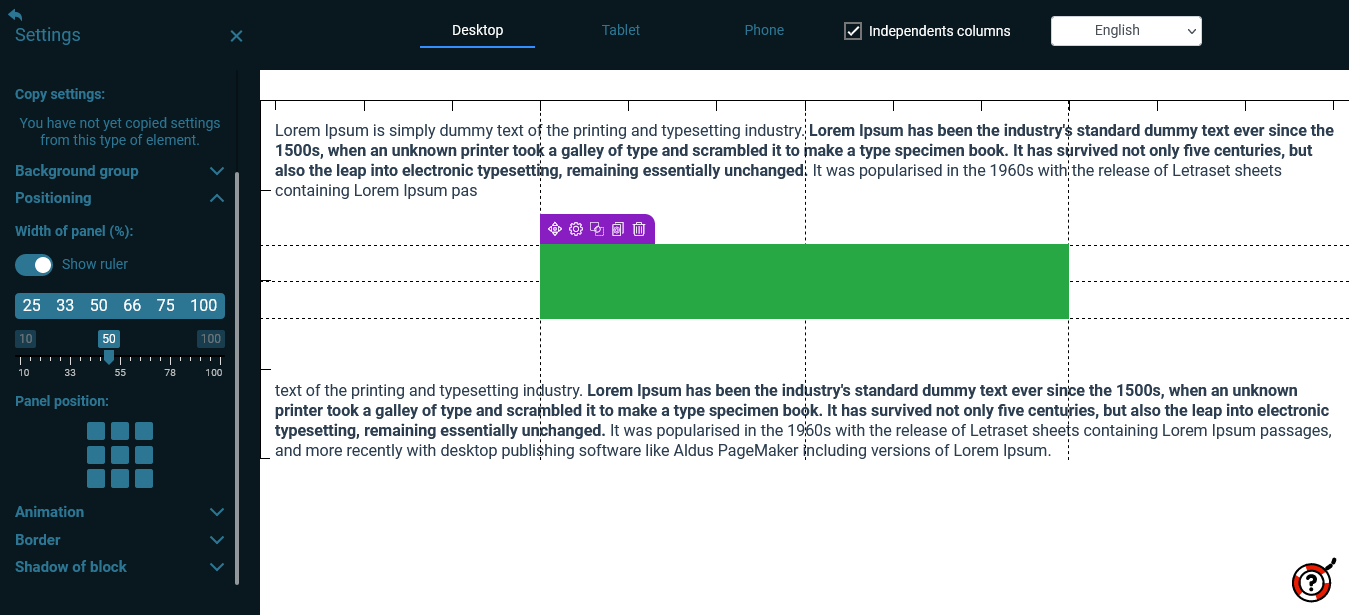
The basic ability to move the "floating panel" was, but there was some discomfort, for example: when placing the panel in the center relative to the radiator section.
We have added a couple of settings to the "Positioning" group: a ruler (horizontally divided into 12 equal segments - the whole constructor works along such a grid, and vertically just for the convenience of centering elements), a slider with a width in% and a "joystick" for quick positioning.
You can see how everything works in this video: # 5 Element "Floating panel" in the constructor (1:06) on our Youtube channel.
All changes can already be tried in practice.
Create even more personalized content with ease and without knowledge of programming languages.
If you do not have time or ideas on how to arrange the content of the page, you can always contact us and we will help. Go to the additional services page and select the services you need.


